Category: Others
This category typically refers to posts that do not fit into one of the predefined main categories.
-

Wechselschalter JUNG 506 KOU als Wechselschalter mit Orientierungslicht verwenden
Bei der Standardbeschaltung des 506 KOU als Wechselschaltung wirkt die eingebaute LED/Glimmlampe (je nach Beschaltung) höchstens als Kontrollleuchte, wenn der zu schaltende Verbraucher verbunden ist. Um die Anwendung der eingebauten LED/Glimmlampe als Orientierungslicht (Dauerlicht) zu betreiben, müssen zwei Punkte beachtet werden: Da die LED/Glimmlampe an die internen Kontakte gebunden ist, lässt sich der Wechselschalter nicht…
-

Securing NVMe SSD Drives: Understanding SE, ISE, and TCG OPAL Protocols for Data Protection
When it comes to data protection for NVMe drives, security protocols like SE (Self-Encryption), ISE (Instant Secure Erase), and TCG OPAL are frequently discussed. Each of these approaches offers distinct mechanisms and advantages in securing sensitive data on NVMe drives, especially for enterprise and data center environments. Self-Encryption (SE) Self-encrypting drives (SEDs) incorporate built-in hardware…
-
Testing Googles Indexing of www.frontiersin.org
On 15th of December 2021 a paper was published on www.frontiersin.org: “The Impact of the COVID-19 Pandemic on Avoidance of Health Care, Symptom Severity, and Mental Well-Being in Patients With Coronary Artery Disease”. Frontiers is a leading Open Access Publisher and Open Science Platform with multiple peer-reviewed and editorial board led journals. Neither Google, Bing…
-
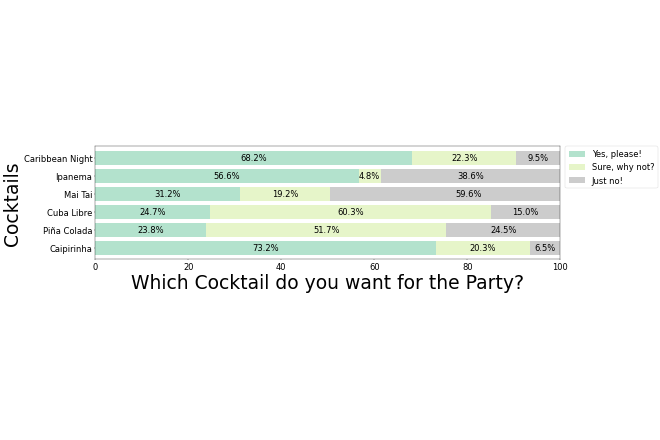
Free and Easy Horizontal Stacked Bar Graphs with Google Colab / Jupyter (as well as Python and Pandas)
Recently, my wife needed to create some stacked bar graphs for her publications. She wasn’t able to find a tool on the internet which allowed her to do this in an easy and shareable way. So I used this opportunity to look into Jupyter Notebooks. These notebooks allow you to document and run code and…
-

Which programming language is the best one?
Is it really possible to answer this question? Yes, the correct answer is: all of them. Or let’s ask another question first: for which problem? There is not “the one and only” best programming language, there are tons. This question is simply not a good one. It’s good for endless discussion, but it’s neither complete,…
-
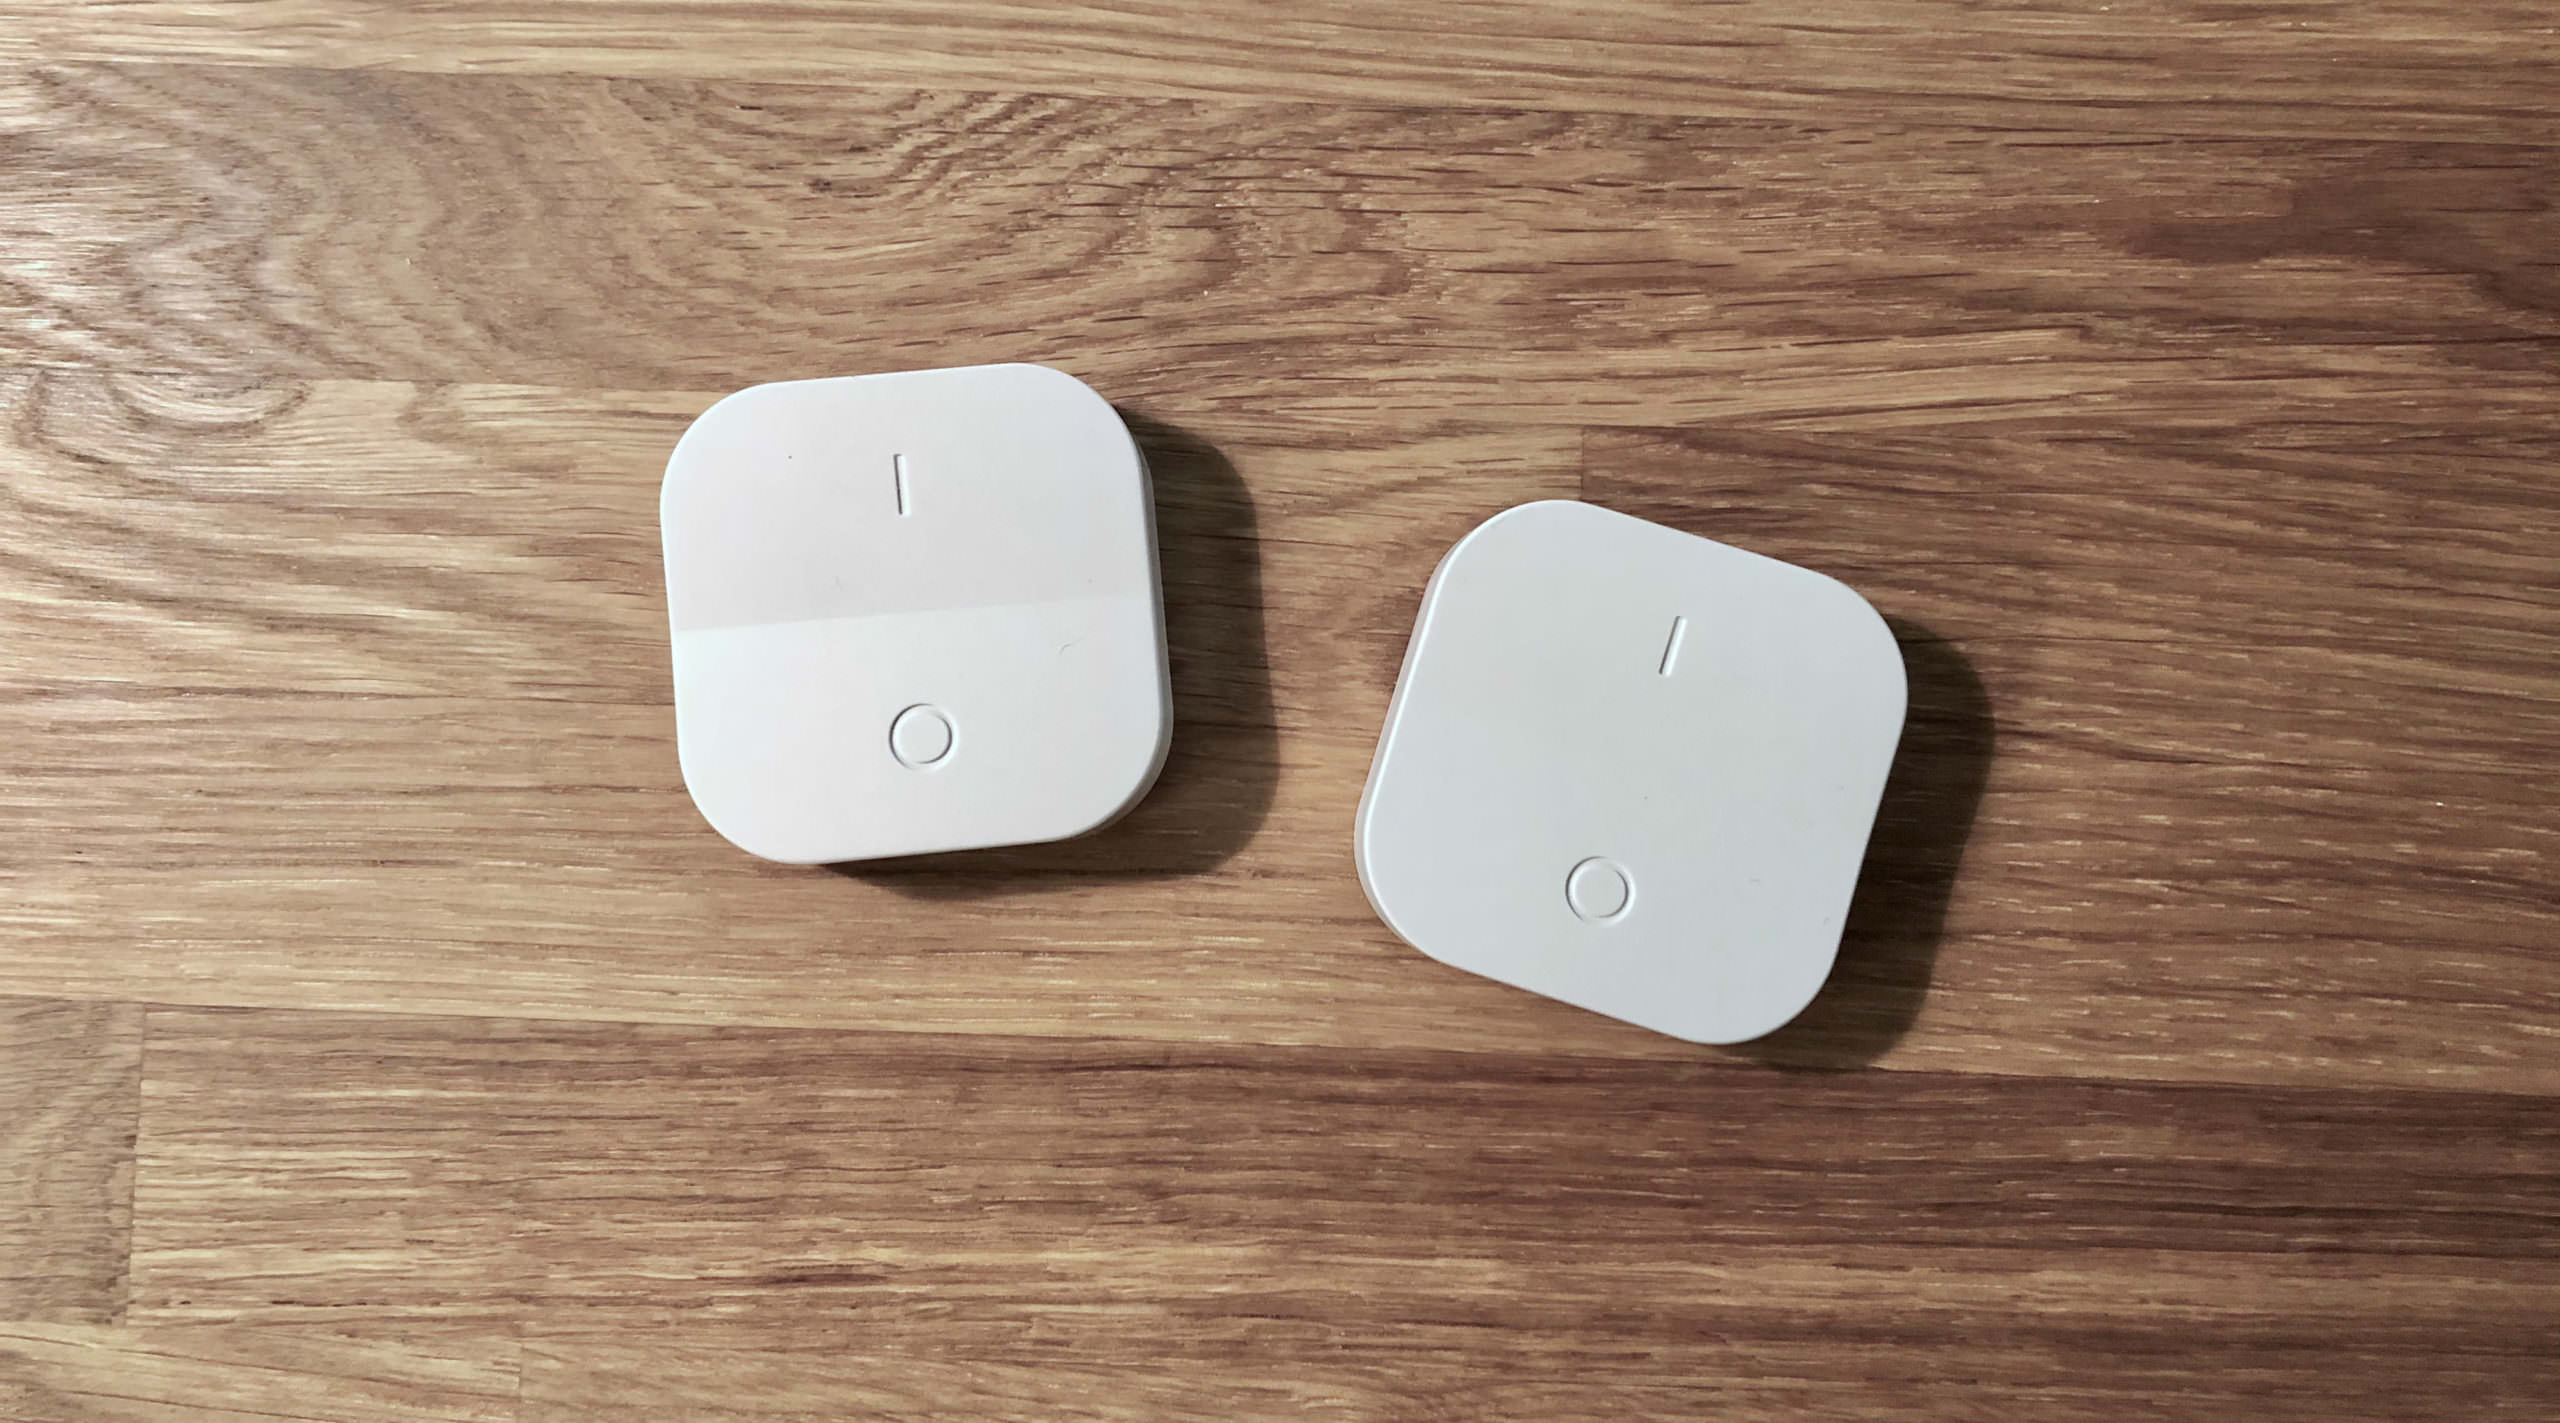
TRÅDRFRI: two controllers for a group of lamps
By default, a group of lamps (or even a single lamp) can only be controlled by a single TRÅDRFRI controller. But in different situations, it would be better to have multiple controllers to control the lamps, e.g. on a long floor. This scenario is not described by IKEA and therefore theoretically not supported. But wait……
-
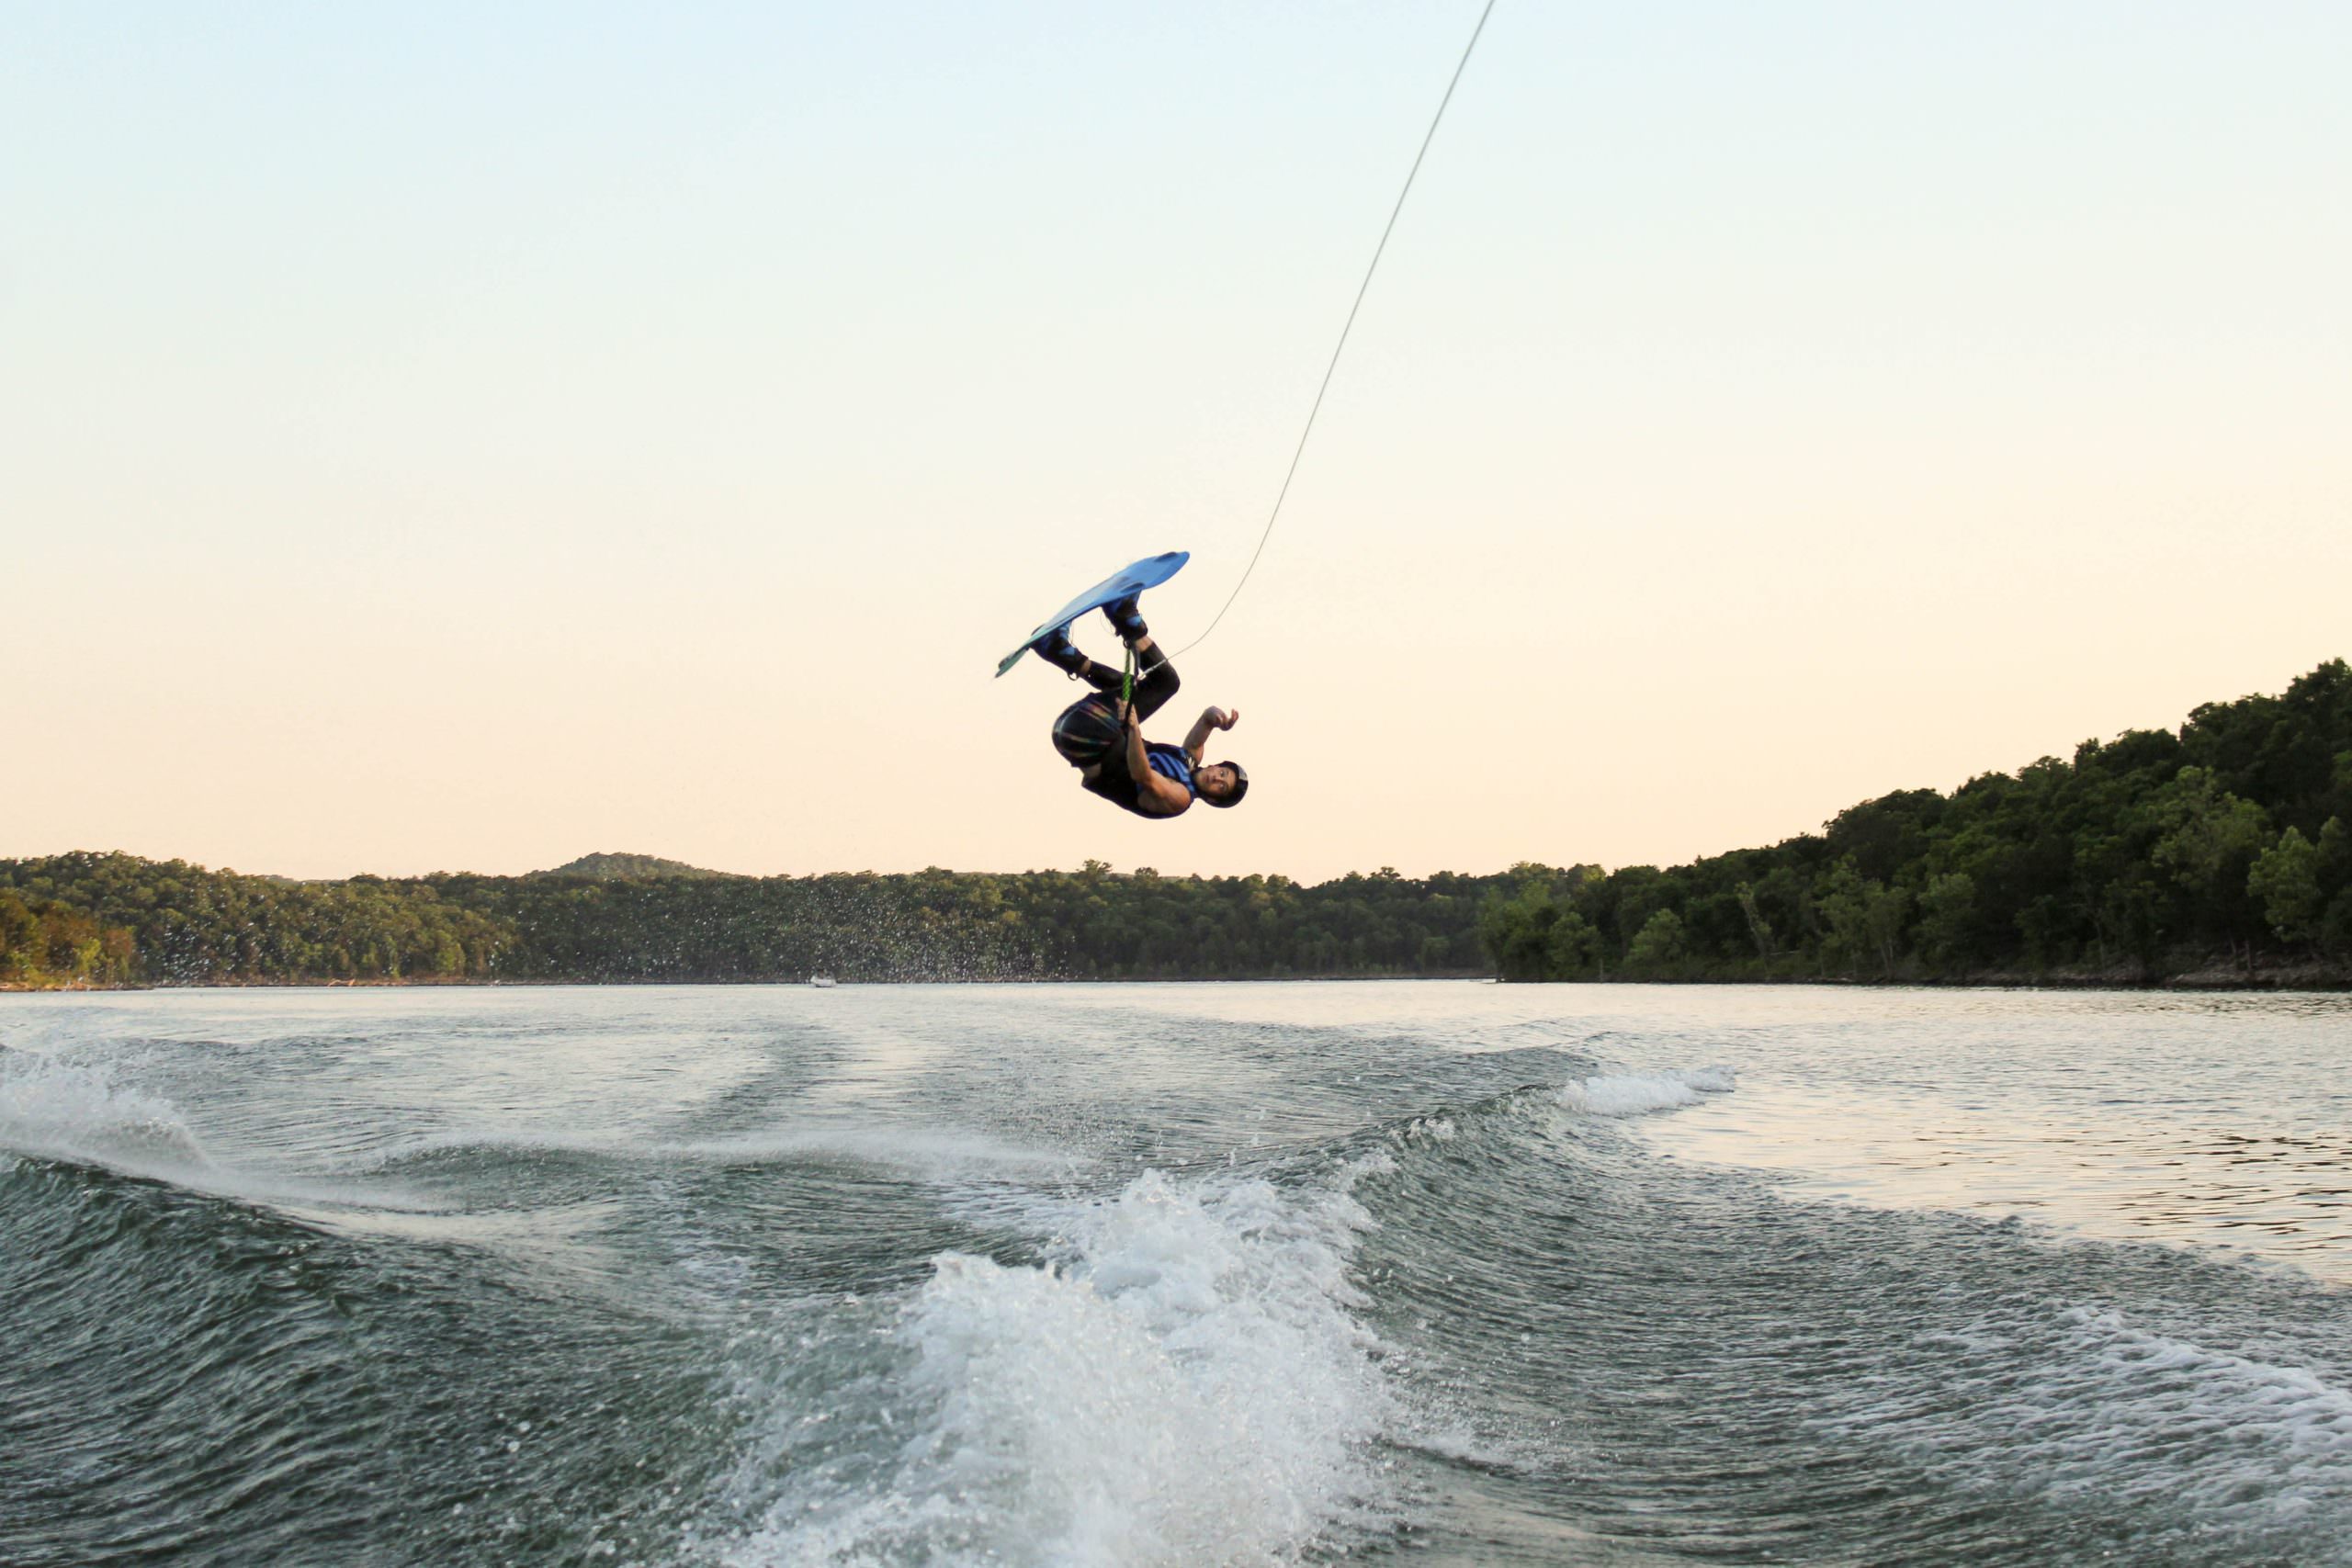
Wakeboarden und Wasserski für jedermann
Wo kann man Wakeboarden? CableparksWakeboarding und Wasserski lässt sich in an zahlreichen Wasserskianlage (den sogenannten Cableparks) fahren. Allein in Deutschland gibt es über 80 Anlagen für dieses Vergnügen. BooteNeben Cableparks ist es auch möglich, sich hinter einem Boot über das Wasser ziehen zu lassen. An vielen Seen gibt es hierfür Anbieter, die diesen Spaß stundenweise…
-

Hello World in 74 natural languages
Hello World is the example of coding which is used to show that a code snippet is running in a specific programming language. But how do you say “Hello World” in different natural languages? Language Translation Afrikaans: Hello Wêreld! Albanian: Përshendetje Botë! Amharic: ሰላም ልዑል! Arabic: مرحبا بالعالم! Armenia: Բարեւ աշխարհ! Basque: Kaixo Mundua! Belarussian:…
-
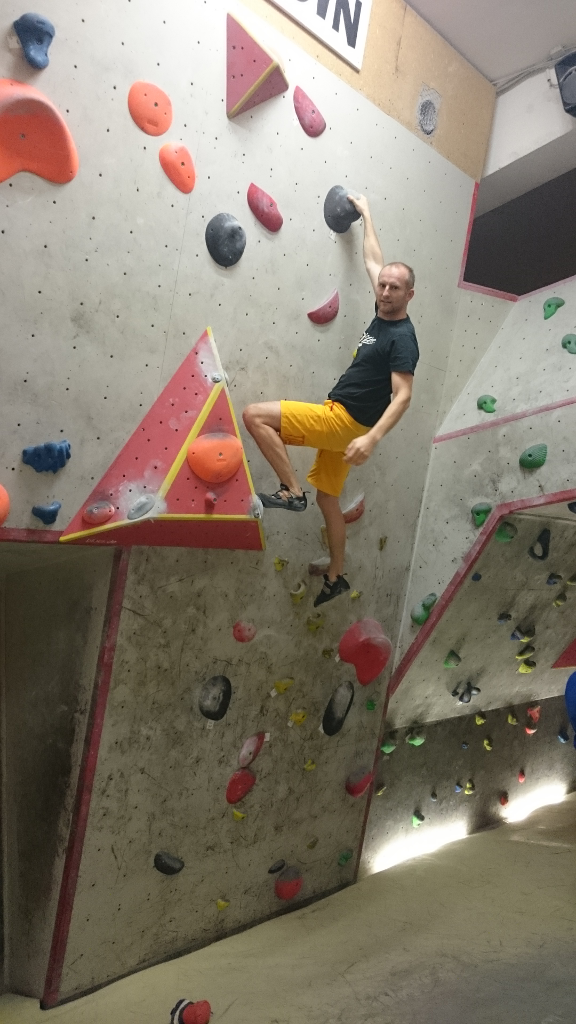
Bouldern in der Boulderlounge Chemnitz
Waren heute in der Boulderlounge in Chemnitz. Ab 21:00 wurden Routen umgeschraubt, wodurch leider kein entspanntes Bouldern mehr möglich war. In Chemnitz ist insbesondere die Trainingsecke sehr interessant. Als Inspiration für die eigene Bouldertrainingsecke bzw. Klettertrainingsecke haben wir mal zwei Fotos gemacht: Die Boulderlounge wird im nächsten Jahr in ein neues Gebäude mit “mehr Platz…
-
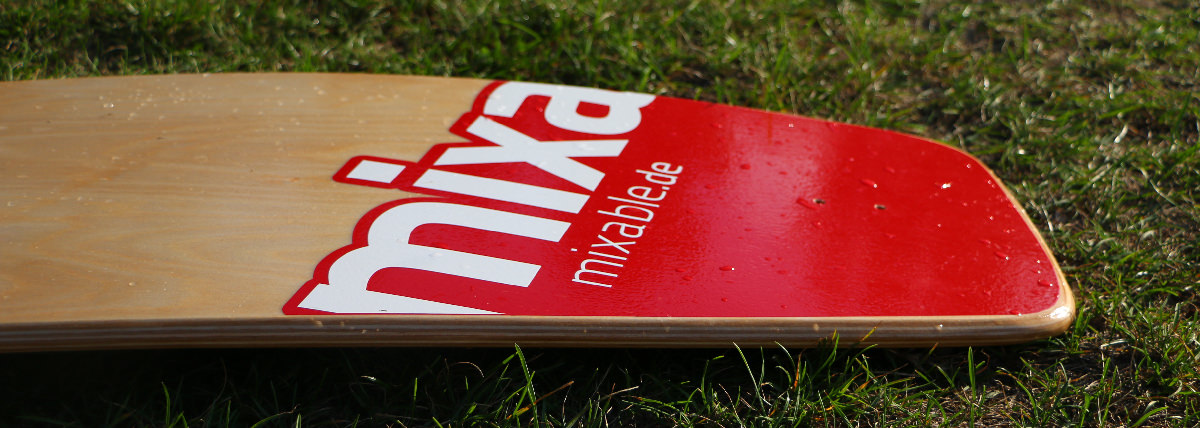
WakeSkate selbst gebaut
Man hat ja gelegentlich Zeit und Ambitionen, etwas selbst zu bauen. Mir war danach, ein WakeSkate-Board selbst zu bauen. Gut, kann auch an einer Wette gelegen haben… 😉 Dieser Beitrag soll eine Notiz sein, damit ich bei möglichen späteren Projekten genau weiß, was ich angestellt habe und wie ich Schritt für Schritt zu diesem Board gekommen bin. Aber…
-
-
SolidWorks: Versionierung von Dateien ohne PDM-System
Auf www.solidsmack.com sind verschiedene Möglichkeiten angegeben, Dateien in SolidWorks ohne zusätzliches PDM-System zu versionieren. So lässt sich eine Kopie jeder neuen Version anlegen, um bspw. nach Änderungen schnell zu vorherigen Versionen zurückzuspringen.
-
Windows7 x64 nebst OS X Lion
Mit dieser Anleitung wird nun auch die letzte “Hürde” genommen um ein MacBook Pro (getestet mit Early 2008) mit 2 Festplatten (oder auch SSD/SSD oder SSD/HDD-Kombi) statt dem obsoleten optischen Laufwerk auszustatten. Aus dem Umbau folgt ein Ärgernis welches nicht ausschließlich mit Boardmitteln von 10.7 bekämpft werden kann. Durch den Umbau kann Windows nichtmehr mit…
-
LTSpice: subcircuit einbinden
Um eine manuell erstellte Netzliste (oder eine Netzliste aus anderen Programmen, z.B. in Form einer *.lib/*.sub/*.cir-Datei) für Simulationen in LTSpice nutzen zu können, sollten die nachstehenden Schritte ausgeführt werden. 1. Netzliste erstellen (wenn nicht vorhanden) Insofern eine Netzliste noch nicht vorhanden ist, kann diese wie folgt erstellt werden: 2. Symbol erstellen, was den subcircuit darstellt…