The following steps describes how to create a certificate for localhost domains for a local webserver on macOS.
Step 1: create a self-signed root certificate
First, let’s create a self-signed root certificate:
openssl req -x509 -nodes -new -sha256 -days 390 -newkey rsa:2048 -keyout "RootCA.key" -out "RootCA.pem" -subj "/C=de/CN=localhost.local"
openssl x509 -outform pem -in "RootCA.pem" -out "RootCA.crt"
The parameter -days 390 sets the number of days, this certificate is valid. Starting on September 1st (2020), SSL/TLS certificates cannot be issued for longer than 13 months (397 days), see stackoverflow.com.
If this time is too long, you will receive an NET::ERR_CERT_VALIDITY_TOO_LONG error. In the command above, this value was set to 390 days, which works for me.
Step 2: define domains and subdomains that should be included in the certificate
For this, just create a text file named vhosts_domains.ext and insert the following contents:
authorityKeyIdentifier=keyid,issuer
basicConstraints=CA:FALSE
keyUsage = digitalSignature, nonRepudiation, keyEncipherment, dataEncipherment
subjectAltName = @alt_names
[alt_names]
DNS.1 = localhost
DNS.2 = *.mixable.blog.local
DNS.3 = mixable.blog.local
This example includes subdomains for a local development environment for the domain mixable.blog.local and all subdomains like www.mixable.blog.local or apps.mixable.blog.local.
If you plan to use a more general certificate e.g. to include all subdomains under *.*.blog.local, this will not work. The definition only supports ‘first level’ subdomains. It would be great, because this saves a lot of additional setup, but unfortunately this is note supported.
Step 3: create the certificate
Now let’s create the certificate:
openssl req -new -nodes -newkey rsa:2048 -keyout localhost.key -out localhost.csr -subj "/C=de/ST=State/L=City/O=Organization/CN=localhost.local"
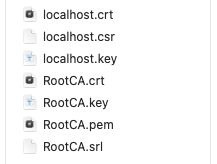
openssl x509 -req -sha256 -days 1024 -in localhost.csr -CA RootCA.pem -CAkey RootCA.key -CAcreateserial -extfile vhosts_domains.ext -out localhost.crtCalling the two commands above will create the localhost certificate that includes all the provided domains and subdomains. Your file listing should look like this:
Step 4: make the certificate available for Apache
Depending on your system, copy all those files into the the configuration folder of the Apache installation. In my case, the installation was done with the help of brew, so the local path is:
<code>/usr/local/etc/httpd/cert/</code>At the end, it’s not important where those files are located, because we no add this path to the vhost definitions. For this, open your vhosts file and link the crt and the key file as follows:
# mixable.blog.local
<VirtualHost *:80>
    ServerAdmin webmaster@example.com
    DocumentRoot "/Users/mathias/Sites/mixable.blog.local"
    ServerName mixable.blog.local
    ServerAlias mixable.blog.local
    ErrorLog "/usr/local/var/log/httpd/localhost-error.log"
    CustomLog "/usr/local/var/log/httpd/localhost-access.log" common
</VirtualHost>
<VirtualHost *:443>
    DocumentRoot "/Users/mathias/Sites/mixable.blog.local"
    ServerName mixable.blog.local
    SSLEngine on
    SSLCertificateFile "/usr/local/etc/httpd/cert/localhost.crt"
    SSLCertificateKeyFile "/usr/local/etc/httpd/cert/localhost.key"
</VirtualHost>
If you have additional vhost definitions, you can add the <VirtualHost *:443> part to every server name entry and use the correct paths to SSLCertificateFile and SSLCertificateKeyFile.
After changing the vhost settings, it is required to restart your Apache server!
Step 5: add the certificates to macOS
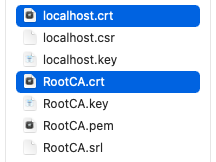
When opening a local website, the certificate should be used but you might see a NET::ERR_CERT_INVALID error. This is the case, because modern browsers/systems do not trust self-signed certificates by default. to overcome this issue, we have to add the created certificates to the macOS Keychain Access. For this, open the *.crt files in Keychain Access:
So that they are know by macOS:
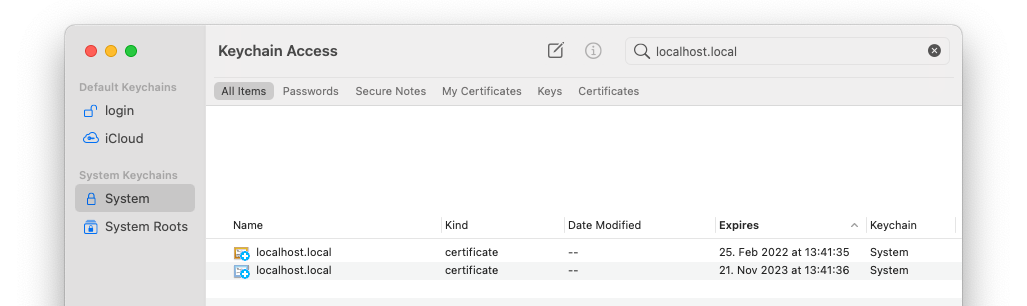
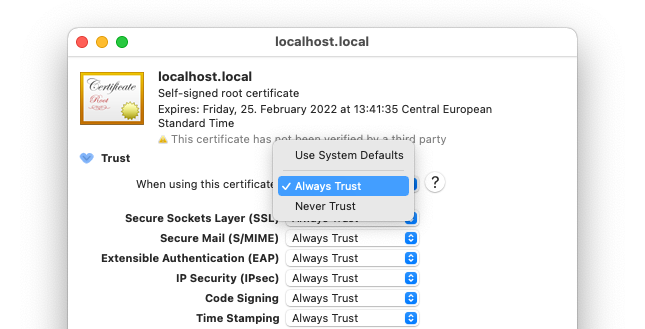
And finally, update the trust settings of each certificate to “Always trust”:
You should now be able to use a secure connection between your browser and your local server:

Step 6: additional fixes
The steps above might already work for Chrome and Safari. If you have problems with Firefox, just open settings and go to Privacy & Security. Then you have to import the root certificate file RootCA.crt, so that Firefox knows about your certificate.
Leave a Reply